Netejar i Desinfectar les Joies del Covid-19

Fa temps vaig fer un post on parlava de com netejar i guardar les joies de plata de manera que no s’oxidin i es mantiguin boniques durant més temps. Et deixo l’enllaç a aquest post aquí:

https://18kt.es/2019/03/26/com-netejar-un-anell-de-plata/

Bé, tenint en compte aquesta informació, he preparat un post amb algunes recomanacions extres, ja que no és el mateix netejar les peces i que estiguin desinfectades.

Les darreres setmanes molts clients m’han preguntat com ho podien fer i si el gel hidroalcohòlic podia fer malbé les joies o tacar la plata, he pensat que estaria bé compartir aquesta informació.

Des del Jorgc (Col.legi de Joiers, Rellotgers i Gemmòlegs de Catalunya) comparteixen tres maneres diferents de desinfectar les joies. S’ha de tenir en compte que aquests consells serveixen per les botigues de joieria, però que l’usuari particular també pot fer a casa:

  1. Cada vegada que s’ofereixi una peça a un client per provar, aquesta s’haurà de netejar amb aigua oxigenada abans de guardar-la. Aquesta neteja es realitzarà submergint la peça en un bany d’aigua oxigenada al 5%, en un recipient d’acer inoxidable o vidre i es farà amb guants de nitril. En el cas de perles, s’evitarà aquest tractament per ser perjudicial per a la peça. El mateix caldrà aplicar en cas de peces rebudes als negocis de compra-venda de joies i or.
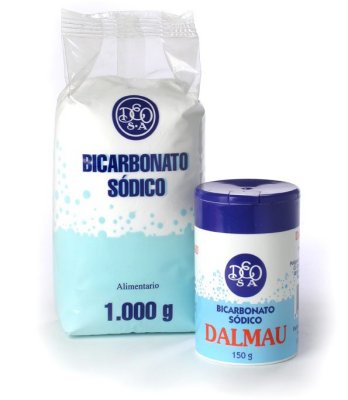
  2. Alternativament es pot desinfectar amb una barreja de vinagre blanc amb bicarbonat sòdic (però tingueu en compte el possible olor): mitja tassa de vinagre blanc + dues cullerades de bicarbonat sòdic. Aquesta dissolució barrejada s’aboca en un recipient net on es deixaran en remull durant aproximadament 2 hores. Un cop transcorregut el temps aquests metalls preciosos s’esbandeixen amb aigua neta i es procedeix a la seva assecat amb un drap de textura suau.
  3. Respecte a la desinfecció amb llum ultraviolada, és possible però no totes les ones de llum ultraviolada serveixen igual. En principi se’ns ha aconsellat la bombeta de llum ultraviolada llunyana d’ona curta (UVC), però aquesta llum ultraviolada és un perill per a la salut humana ja que pot provocar càncer de pell i cataractes, el que impedeix el seu ús en espais públics. També s’ha d’estudiar si pel mateix motiu podria afectar a algunes gemmes de color o causar la depolimerització del cauxú si s’exposa molt de temps.

Bé, explicat això i tenint en compte la meva experiència els meus consells per netejar les vostres joies a casa són:

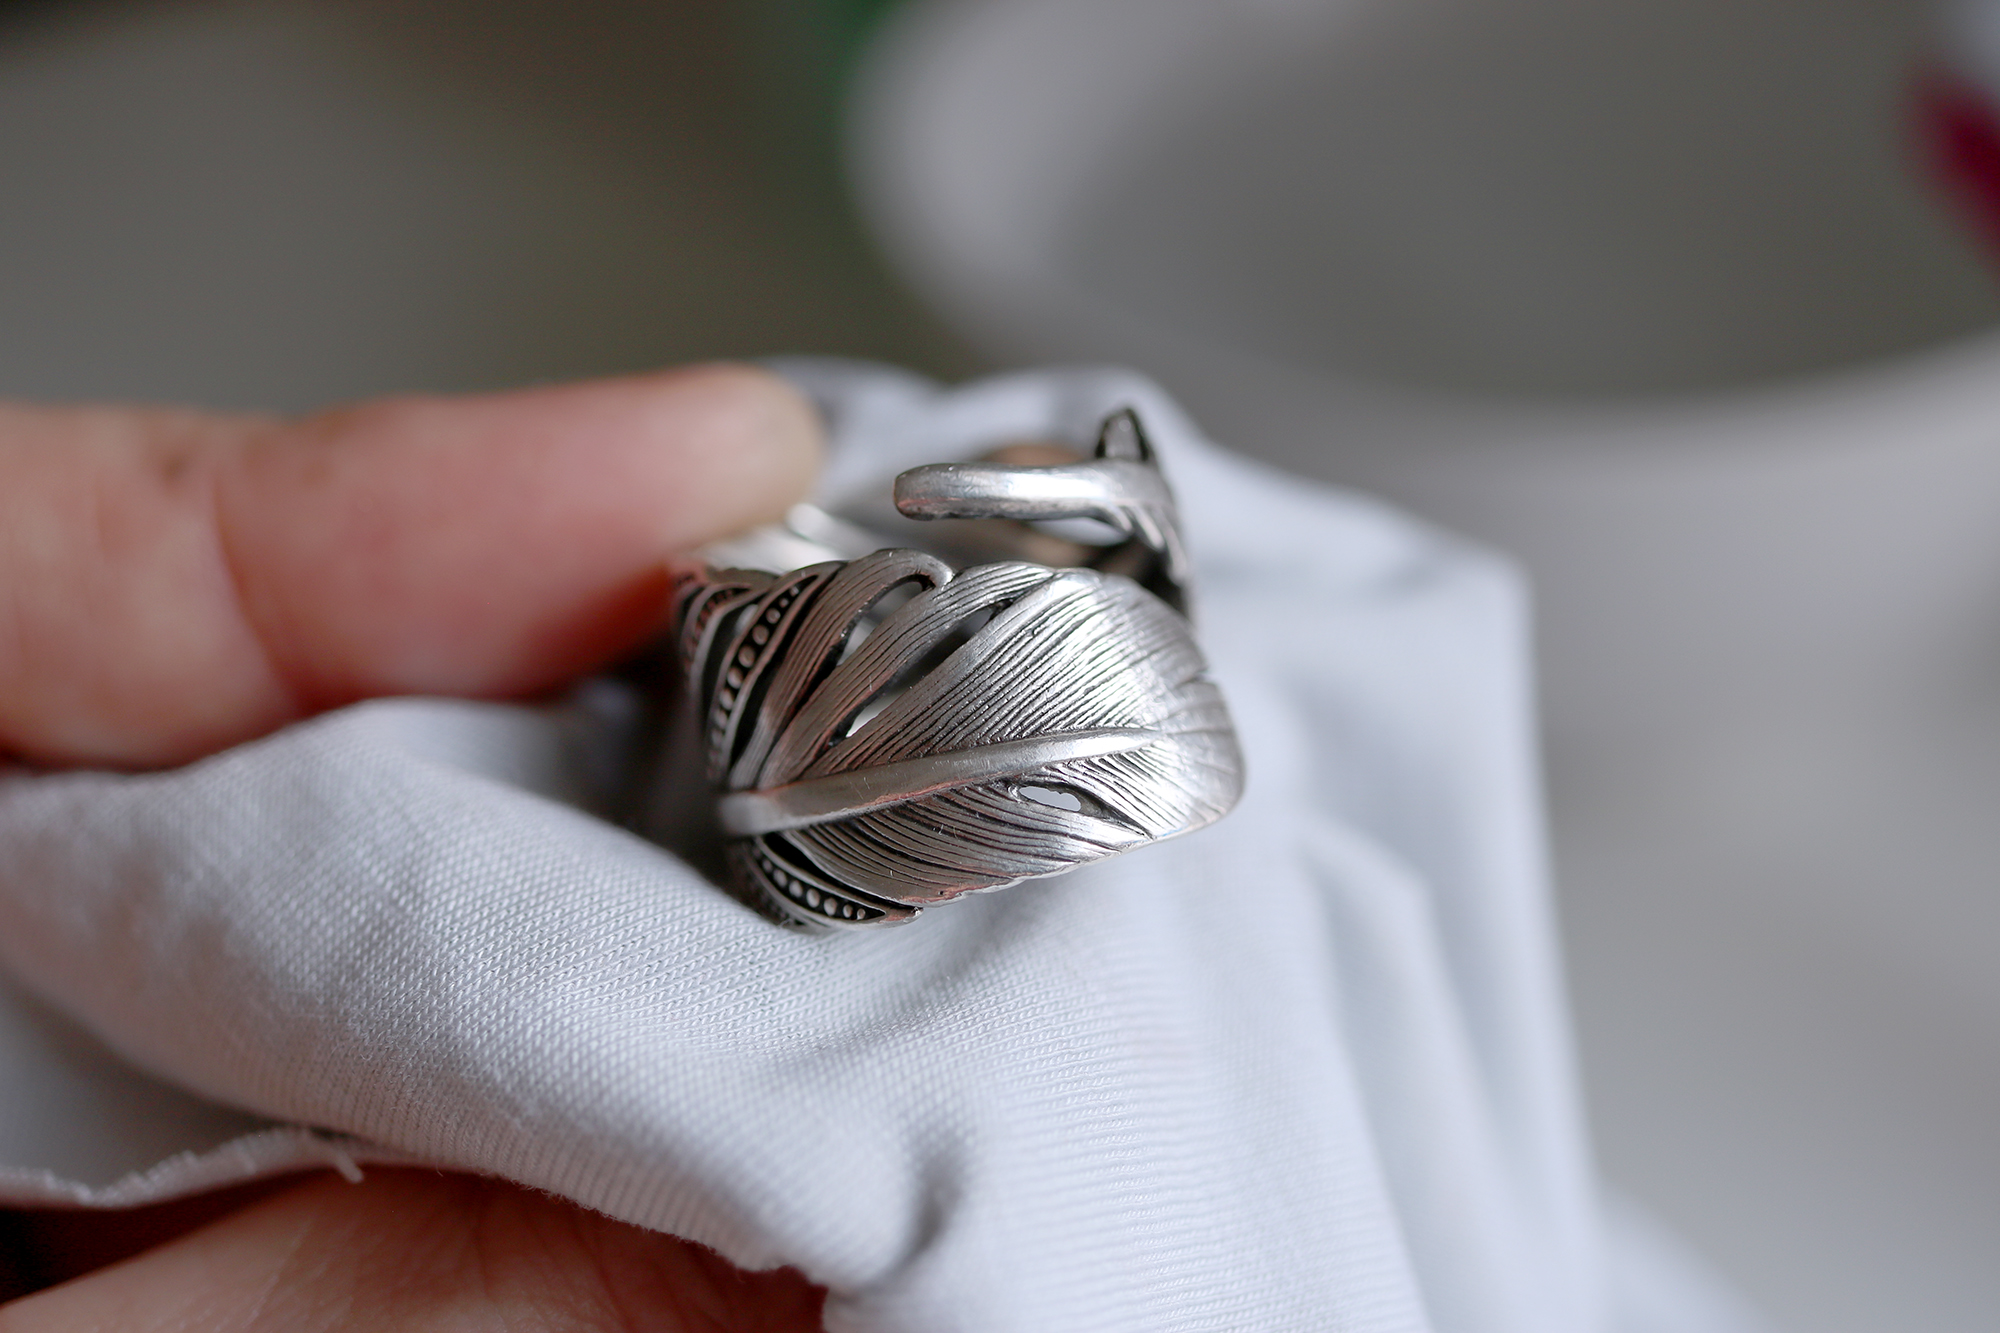
  • Aigua, sabó de rentar plats i aigua calenta. És el sistema més pràctic, el que no farà malbé les vostres joies ni les pedres. No mata el virus, però l’elimina de la superfície de la joia igual que ho fa quan et rentes les mans amb aigua i sabó. La millor manera és posar aigua calenta (que no cremi) en un recipient, afegir-hi unes gotes de sabó de rentar plats i rentar la joia amb un raspall suau de dents. Un cop neta, s’esbandeix amb aigua i s’asseca amb un drap de cotó.
  • Gel hidroalcohòlic. Si ets fora de casa i no tens a mà aigua i sabó, el millor és aquest tipus de gel. Es pot utilitzar amb les joies posades, i no hi ha perill que es facin malbé. Només s’ha de tenir cura amb les joies que portin algun tipus de pàtina, bany o pedres poroses com Turqueses, Lapislàtzuli, Corall, pedres Cristal.litzades, Perles,…ja que l’alcohol que porta podria tacar el metall o fer que algunes pedres canviin de color. Si tens algun dubte pots preguntar-me quines joies poden netejar-se així i quines no. El meu consell és que un cop siguis a casa, encara que hagis fet servir el gel pel carrer, et rentis les mans i les joies amb aigua i sabó.
  • Aigua oxigenada. L’aigua oxigenada barrejada amb aigua va molt bé per treure oxidació de la plata i resulta que també funciona com a desinfectant. El meu consell aquí és el mateix que amb el gel hidroalcohòlic, no totes les pedres ni acabats de joieria suportaran aquesta neteja, o sigui que s’ha d’anar amb cura.

Bé, i et preguntaràs, i jo què faig? Doncs les meves joies les netejo a diari amb aigua i sabó, tantes vegades com em rento jo les mans, i si sóc fora al carrer faig servir el gel hidroalcohòlic.

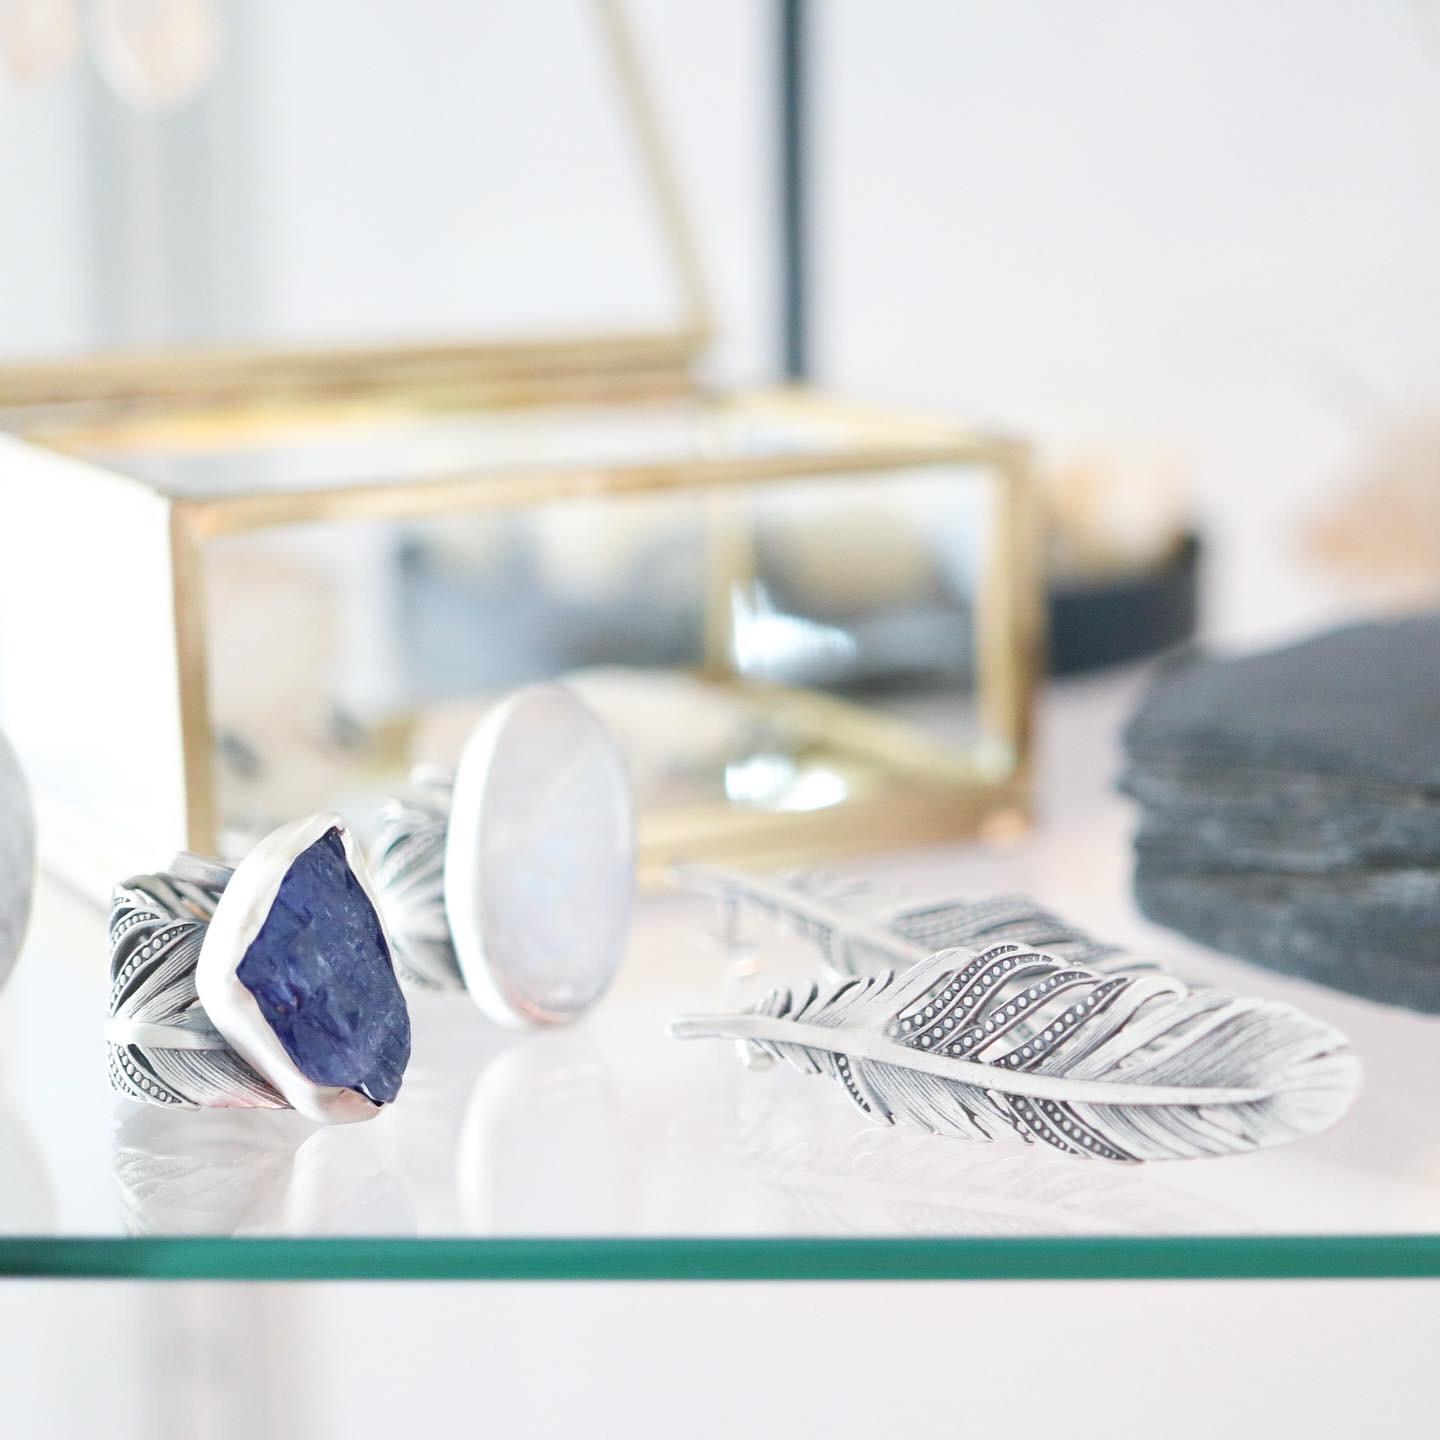
Les joies que tinc a la web, abans d’enviar-te-les les netejo amb aigua i sabó, ultrasons o alcohol, tenint en compte les pedres que portin o si tenen alguna pàtina. I les empaqueto amb les mans ben netes i mascareta. Per tant, quan t’arriben estan netes i a punt perquè les llueixis sense perill.

Si tens algun dubte o pregunta em pots deixar un comentari aquí sota o enviar-me un mail a: hola@martaoms.com. Espero que aquesta informació et sigui d’ajuda!

Shopify vs Etsy

>> Versió en Català a sota. ;-D

I’m selling on Etsy since more than 11 years ago and I always recommended this site to all the people that asked me about opening an online store. Since some years ago I realised that mostly of the sellers that were on Etsy since the beginning left it to open their own stores. Etsy started to change the way of working and their community is not the same it was. So I decided to change the design of my own website into Shopify to have there my store too. I have my Shopify store since 2 years ago and I’m very happy with it.

I’m writing this article because most of you asked me information from both places and I thought that it’s a good idea to have a comparative. I’m sharing the information I found in both sites and my personal experience using them the last years.

ETSY

Etsy has two types of stores; the Standard that is Free and the Etsy Plus that is 8,90€ every month. I have this last one and with this price they include 15 Listing credits each month (2,7€ each month) and 4,40€ credit to use on Etsy Adds each month. This means that you can use these credits every month but if you don’t use them, they expire.

They offer you a site with your store name and you don’t need to have your own domain if you don’t want to.

Moreover, each piece you list on Etsy (no matter if you have free plan or the Plus) they charge 0,18€. The listing last 4 months, so when this listing expires you have to pay again 0,18€ to relist it.

The Transaction fee on Etsy is 5% from your listing price and from your shipping price. This is one of the latest changes, they charge you for the shipping rates too.

** I found these prices here (I just changed them into Euros because it’s the currency I work with).

Having a Store on Etsy open your business to selling worldwide and complete access to their community of buyers and sellers. So, you only have to worry to have good photos, a nice description and SEO and Etsy does the publicity and promotion for you. The only problem is that Etsy is big enough and difficult for starting sellers get a good position on their searching engines.

SHOPIFY

Shopify is not a community like Etsy. It works more like a website/store platform and you pay the services for that.

I have my own website/store with Shopify and they offer you a 14 days free trial that is very useful to start working and designing your site. After that, you can decide to select the Subscription you prefer depending on your business. I have the Shopify Basic which is 26€ each month. They offer you free templates, connect your store to your own domain and connect your Shopify store to Instagram and Facebook. Also a good POS (point of sale) perfect to use if you do markets and sell by credit card.

The Shopify Transaction fee is 2% from your entire order, including shipping costs. You can choose Paypal or Shopify Payments, and the rates are quite different. Paypal charge you (as a seller that sell less than 2500€ each month) 3,4% + 0,35€ for each transaction. If you use Shopify Payments they charge 2,4% + 0,25€ for each transaction and they use Stripe as software for these payments.

** I found these prices here (I just changed them into Euros because it’s the currency I work with).

To finish, Shopify has lots of apps and templates to design your own site but they don’t promote your business or give traffic to your site. You must to invert in publicity or bring your own traffic to your site.

ETSY – SHOPIFY

Just to give you and example and make it more easy I decided to make the comparative if I sell my Feather ring in both places.

My Feather ring is 70€ + 3€ from Registered Mail (I have Free Standard Shipping)

ETSY Charged me:

  • 3,22€ of Taxes
  • 3,50€ of 5% Transaction Fee
  • 0,15€ of 5% Shipping Transaction Fee
  • 0,18€ Listing Fee
  • + Etsy Plus 8,90€ each month (You can choose the Etsy Free version)

SHOPIFY Charged me:

  • 1,46€ Transaction Fee
  • 2,83 € from Paypal fee (this is charged on your Paypal account)
  • + Monthly Plan 26€

And just to finish this article I wanted to offer a list of opinions about some sellers and customers that use both sites. I posted this on my Instagram some months ago and you can read some opinions in my comments here

I hope this article will be useful and help you to decide what is better for your business. Leave your comments and questions below and I will answer them!


Fa més de 11 anys que venc a Etsy i sempre l’he recomanat a tothom que em preguntava com començar a vendre online. Des de fa uns anys m’he adonat que els venedors que eren a Etsy des dels inicis com jo l’han anat abandonant per crear les seves propies botigues online. Ultimament, Etsy ha canviat la manera de treballar i la seva comunitat ja no és la mateixa que era. Per això, jo també vaig decidir canviar el disseny de la meva web a Shopify per tal de tenir-hi la meva propia botiga. Tinc la meva botiga a Shopify des de fa dos anys i n’estic molt contenta.

Estic escrivint aquest article perquè molts de vosaltres m’heu demanat informació dels dos llocs i he pensat que seria una bona idea fer una comparativa. Aquí sota comparteixo la informació que he trobat als dos llocs i la meva experiència fent-los servir els últims anys

ETSY

Etsy té dos tipus de botiga; la Standard que és Gratuïta i Etsy Plus que val 8,90€ cada mes. Jo tinc Etsy Plus i amb el preu que pagues inclouen credit per 15 llistats cada mes (valorats en 2,7€) i credit de 4,40€ per utilitzar en Etsy adds. Això vol dir que pots utilitzar aquesta credits cada mes però que si no els utilitzes, caduquen.

T’ofereixen un espai amb la teva botiga i no necessites tenir el teu propi domini si no vols.

A més, per cada peça que carregues a la teva botiga (és igual si tens el pla gratuït o el Plus) et cobren 0,18€. Aquest anunci dura 4 mesos, un cop han passat els 4 mesos caduca i has de tornar a pagar 0,18€ per publicar-lo de nou.

La Tarifa de Transacción es del 5% del precio de tu producto i del precio de tu envio. Aquest és un dels últims canvis que han fet, que et cobren per l’import que tens posat d’enviament.

** He trobat aquests preus aquí (només els he convertit de Dólars a Euros perquè és la moneda amb la que treballo).

Tenir una botiga a Etsy t’obre les portes a vendre per tot el món i accés a la comunitat d’Etsy de venedors i compradors. Només t’has de preocupar de tenir unes bones fotos, una bona descripció i dominar el SEO, i Etsy fa la publicitat i la promoció per tu. L’únic problema és que Etsy és tan gran que cada vegada es fa més difícil pels venedors que comencen fer-s’hi un lloc i vendre.

SHOPIFY

Shopify no és un comunitat com Etsy. Funciona com una web-botiga online pròpia i pagues aquests serveis.

Jo tinc la meva pròpia web-botiga amb Shopify i ofereixen 14 dies de prova gratuïta que va molt bé per començar a treballar i dissenyar la teva web. Després d’aquests 14 dies pots seleccionar la Subscripció que t’encaixi més amb el teu negoci. Jo tinc el Shopify Basic que costa 26€ al mes. T’ofereixen plantilles gratuïtes, conexió de la teva botiga al teu propi domini i conectar la teva botiga Shopify a Instagram i Facebook. Pots administrar la web i porductes totalment des del mòbil o tablet. També tenen un bon POS (punt de venda) per utilitzar si fas markets o vens amb targeta de crèdit.

La Comisió de Venda de Shopify és del 2% del total de la venda, incloent els gastos d’enviament. Pots triar rebre pagaments amb Paypal o amb Pagaments Shopify, i les comissions són una mica diferents. El Paypal et cobra (com a venedor que factura menys de 2500€ cada mes) 3,4% + 0,35€ per cada transacció. Si utilitzes el Pagament de Shopify et cobren 2,4% + 0,25€ per cada transacció i utilitzen Stripe com a plataforma per aquests pagaments.

** He trobat aquests preus aquí (només he canviat els preus de Dólars a Euros perquè és la moneda amb la que treballo).

Per acabar, Shopify té moltes aplicacions i plantilles per dissenyar la teva propia web però no promocionen el teu negoci o envien trafic de visites a la teva web. Has d’invertir en publicitat o portar tu mateix visites a la teva botiga.

ETSY – SHOPIFY

Pel tal de que sigui més grafic, et vull donar un exemple d’un producte, i he fet una comparativa dels preus i dades si venc el meu anell de Ploma als dos llocs.

El meu anell de Ploma val 70€ + 3€ d’enviament Certificat (tinc enviament Standard Gratuït).

ETSY em cobra:

  • 3,22€ of Iva
  • 3,50€ of 5% Comissió de Transacció
  • 0,15€ of 5% Comissió d’enviament de la Transacció
  • 0,18€ Preu llistat de producte
  • + Etsy Plus 8,90€ cada mes (pots triar tenir la versió gratuïta d’Etsy)

SHOPIFY em cobra:

  • 1,46€ Comissió de Transacció
  • 2,83 € de Comissió de Paypal (aquest import és carregat al teu compte de Paypal)
  • + Pla Mensual 26€


I per acabar aquest article volia oferir-te una llista d’opinions de venedors i compradors que utilitzen les dues plataformes. Fa uns mesos vaig publicar aquest post al meu Instagram i allà hi ha varies opinions als comentaris.

Espero que aquest article sigui útil i t’ajudi a triar què és millor pel teu negoci. Pots deixar comentaris i preguntes que tinguis aquí sota i les respondré!

GRS Bench Pin

(Versió en català a sota)

Some weeks ago I was showing you my GRS bench system and lots of you were asking about it, so I’ve decided to write a post talking about GRS Tools.

GRS Tools is a USA based company that makes jewelry tools since 1977, they’re more focused on engraving tools but their GRS system is perfect to be used in any jewelry table.

I discovered their GRS Bench system some years ago and I’ve decided to buy it at Rio Grande and install it at my table. I have been years working uncomfortable because the system I had at my table to hold my bench pin wasn’t stable. So, every day my bench pin move when I was working and this make me feel disappointed.

The great thing from GRS Bench pin is that it can be setted in any jewelry table and it let you change the bench to other tools easily. I also have two pins, one to work with metal and one to work with wax.

Here’re the components you can find at Rio Grande to set your GRS bench pin:

GRS® BenchMate Mounting Adapter
Item #: 118177
GRS® BenchMate Mounting Plate
Item #: 118126
GRS® BenchMate® Bench Pin Kit
Item #: 113857

I personally only used the Mounting plate because for my bench I thought that I didn’t need the Adapter.

I’m very happy with the change I did and now I’m working more comfortable and my pin don’t move!

Here is a video where they explain how to install the Bench pin and you can see the BenchMate Tool that you can install to work as setting stones or to engraving, I love it!

Here I share the links so you can find easily the company, their youtube channel and where to buy it.

RIO Grande

GRS Tools

GRS Tools Youtube


(Catalan version)

Fa unes setmanes vaig fer un video on es veia la meva estallera i molts em vareu demanar sobre el sistema que feia servir, per tant he decidit fer un post sobre les Eines de GRS.

GRS és una empresa Americana que fa eines per joiers des del 1977. Estan més enfocats a gravadors i clavadors encara que els seu sistema és perfecte per qualsevol taula de joier.

Vaig descobrir el seu sistema GRS fa uns anys i no m’ho vaig pensar dues vegades en comprar-lo a Rio Grande i instal.lar-lo a la meva taula. Feia anys que treballava incòmode perquè el sistema que tenia a la meva taula per aguantar l’estallera no era estable. I cada dia, mentre treballava, l’estallera se’m movia i em feia posar molt nerviosa.

La gràcia de l’estallera de GRS és que es pot instal·lar en qualsevol taula i et deixa canviar l’estallera per altres eines d’una manera super fàcil. Jo en tinc dues, una que la faig servir per treballar el metall i l’altra per treballar amb ceres.

Aquí tens els components que pots trobar a Rio Grande per instal·lar l’estallera GRS:

GRS® BenchMate Mounting Adapter
Item #: 118177
GRS® BenchMate Mounting Plate
Item #: 118126
GRS® BenchMate® Bench Pin Kit
Item #: 113857

Jo personalment només vaig fer servir el Mounting plate perquè per la meva taula em va semblar que no em feia falta l’Adaptador.

Estic encantada amb el canvi i ara puc treballar còmodament sense que la meva estallera es mogui!

Aquí comparteixo un video on s’explica com instal·lar l’estallera en una taula (perquè veieu que és fàcil) i també hi podeu veure com funciona una altra eina que tenen que es diu BenchMate que és ideal per gravar i clavar pedres. M’encanta!

Aquí et deixo amb els enllaços de GRS Tools, el seu Youtube i Rio Grande.

Rio Grande

GRS Tools

GRS Tools Youtube

Green Lion Saw Frame

Teniu la versió en Català a sota

Since some time ago, lots of jewelers were asking me about my Green Lion Saw Frame and why I use this saw frame and not another one. So I decided to write my opinion and my feedback about it.

First of all, I want to remark that I’m working as a jeweler since 20 years ago and I have the first version of Green Lion Saw Frame. I bought mine almost 6 years ago, at the first beginning of them.

Before that, I always worked with the most common saw frame, I worked with it almost 15 years and I never felt the need to change it.

One day I started to see some jewelers I was following talking about the Green Lion Saw Frame and all of them were recommending it. So I decided to buy one because mine was quite old and decided to change it and try this new design.

My surprise was that when I started to work with it, it was so great. The feeling when you hold it is more comfortable because of its hard rubber handle and the weight is better distributed. When you work the saw frame doesn’t go to the sides or backwards like the traditional ones, so having a better distributed weight makes it much easier to saw with it.

I must explain also that I loved the design, the shape and the black colour made that I loved it the first time I saw it. But, it also works amazingly, so what else can I ask?

I just discovered this amazing video where the creator explains why he designed this saw frame and why this one is different from the others.

To finish I need to explain that I know about a very technical saw frame called Knew Concept, that it’s very interesting. I know a lot of jewelers that use this one too and they’re very happy, so here is also a photo of it and a video from RioGrande talking about it. I personally don’t have this one but maybe in future I will try it.

Style: “Neutral”

So, after these videos and information, which one is your favourite? I’m sure that Green Lion will gain lots of new fans, I’m true?

You can find the Green Lion Saw Frame:

You can find the Knew Concept Saw Frame:


<<< Català <<<

Des de fa temps molts joiers em pregunten sobre la meva serra Green Lion i el perquè faig servir aquest arquet i no un altre. Per tant he decidit escriure la meva opinió i la meva experiència sobre ell.

Primer de tot, vull remarcar que treballo de joiera des de fa 20 anys i que tinc la primera versió de l’arquet Green Lion. Vaig comprar-lo fa uns 6 anys, ben bé al principi que els començaven a fer.

Abans, sempre havia treballat amb l’arquet de joieria tradicional, vaig treballar-hi uns 15 anys i mai vaig tenir la necessitat de canviar-lo.

Un dia vaig començar a veure que alguns joiers que seguia parlaven del Green Lion i tots ells el recomenaven. O sigui que vaig decidir comprar-ne un ja que el meu arquet ja estava vell i havia decidit canvia-me’l, i volia provar aquest disseny.

La meva sorpresa va ser quan, un cop el vaig tenir a les meves mans, i vaig començar a treballar-hi, era fantàstic. La sensació és que és molt més còmode degut al seu mànec de goma i alhora el pes està molt millor distribuit. Quan el fas servir no es tomba cap als costats o enrerra com em passava amb l’arquet tradicional, o sigui que com que té el pes molt més ben equilibrat fa que sigui molt més fàcil serrar amb ell.

També haig de confessar que em va encantar el seu disseny, la seva forma i el color negre van fer que m’encantés des del primer moment que el vaig veure. Però, és que a més, funciona molt bé, per tant, què més li puc demanar?

Fa uns dies, vaig descobrir aquest video interessant on el mateix creador explica perquè va dissenyar l’arquet i perquè és diferent de la resta.

Per acabar, necessito explicar també que conec un altre disseny d’arquet més tècnic anomenat Knew Concept, i que el trobo molt interessant. Sé que molts joiers el fan servir i que en parlen molt bé, per tant aquí en teniu també una foto i un video de RioGrande parlant-ne. Jo personalment no el tinc i no l’he provat però potser en un futur ho podré fer.

Style: “Neutral”

Per tant, després d’aquests videos i informació, quin és el vostre arquet de joieria preferit? Jo estic segura que avui el Green Lion guanyarà molts fans nous, no us sembla?

Podeu trobar la serra Green Lion:

Podeu trobar la serra Knew Concept:

Com netejar un anell de plata

>> English version below <<

Fa temps que tenia en ment escriure aquest article perquè tinc varis clients que em demanaven com netejar les seves peces de plata. Espero que la informació que et compateixo pugui resoldre els teus dubtes i et sigui d’ajuda.

El primer pas abans de netejar un anell de plata és classificar-lo depenent del seu acabat i de si porta una pedra o no. Com netejar un anell si porta pedra? Heu de tenir en compte que casi tots els productes per netejar plata poden fer malbé les pedres poroses com la Turquesa, el Lapislàtzuli, les Perles, l’Ambre, els Opals,…em podeu preguntar si la pedra del vostre anell admet productes de neteja o no. Per tant, el meu consell en anells amb pedra, si no sabeu si la pedra que porta és porosa, és fer servir sabó de rentar els plats (tipus Fairy o Mistol), esbandir amb aigua i eixugar amb un drap de cotó.

El pas següent es veure si l’acabat de l’anell és mate, polit o oxidat. Si tens un anell de plata polit, podràs utilitzar casi tots els productes per netejar-lo. Jo utilitzo Hagerty Silver Clean, i el pots trobar en botigues de joieria o a Amazon. Aquest producte neteja les peces de plata només submergint-les dins del líquid i després n’hi ha prou en ensabonar-les i passar-hi aigua perquè quedin com noves. També és perfecte per netejar les peces amb acabat mate ja que aquest producte no és abrassiu o sigui que no poleix l’acabat mate de la peça ni ratlla les peces polides.

Pels anells de plata polida també pots fer servir un drap de polir, jo utilitzo Town Talk Original i també el pots trobar a les botigues de joieria o a Amazon. Aquest tipus de drap també és perfecte per netejar les peces que tenen algunes parts de l’acabat oxidades (com el meu anell de ploma). El pots fer sevir per netejar les arees polides tot mantenint les parts oxidades en negre.

Si tens un anell de plata mate no et recomano que facis servir aquest drap ja que pot fer que la peça es vegi més bruta. Per tant, per netejar un anell amb l’acabat mate el millor és fer servir el Hagerty Silver Clean tal com us he explicat però si no vols invertir en un producte químic també pots fer servir Bicarbonat. És usual tenir Bicarbonat a casa, o sigui que el pots fer servir per netejar l’anell amb un raspall de dents vell que tinguis, per acabar amb una ensabonada i que l’eixuguis amb un drap de cotó serà suficient. Si utilitzes Bicarbonat en una peça polida pots ratllar la peça i fer que sigui mate enlloc de brillant.

Si tens una joia amb parts oxidades, la millor manera de netejar-la és fent servir el drap per polir o aigua i sabó. Si fas servir un netejador abrasiu l’únic que aconseguiras és que marxin les parts oxidades decoratives de la peça i que es vegi més polida.

Crec que no m’he deixat cap consell i que s’entenen bé tots els pasos i el perquè un producte va molt bé per unes joies però pot fer-ne malbé unes altres. Per tant, i per acabar, vull remarcar que casi tots els artesans i joiers donen instruccions de com netejar les seves creacions. La millor manera de saber-ho sempre és preguntant els dubtes que tinguis al teu joier de confiança i segur que sempre et podrà ajudar a mantenir les teves joies boniques com el primer dia.


I have been thinking on write this post since some time ago, because I have some customers asking how to clean their silver pieces. I hope the information below can answer your questions and it can be helpful.

First step on cleaning a Silver ring is classify it depending on the finish it has and if it has a stone on it or not.

How to clean if the Silver ring has a stone. Take note that mostly of the products we can use can damage the porous gemstones, like Turquoise, Lapis lazuli, Pearls, Amber, Opal,…you can ask me if the stone on your ring accept cleaning products or not. So my advice on Gemstone silver rings is clean the piece with dishwasher soap and a toothbrush. Rinse with water and dry with a cotton cloth.

Next step is see if the finish of the ring is mat, polished or oxidised. If you have a polished Silver ring, you can use mostly of the products to clean it. I normally use Hagerty Silver Clean, you can find it on Amazon or specialised jewelry stores. This product cleans silver pieces only submerging the jewel inside and then rinse with soap and water. It’s also perfect to clean jewelry pieces with mat finish because you don’t need to use any abrasive product to clean, so it don’t polish your piece and don’t scratch the polished one.

For your polished Silver ring you also can use a Polishing cloth, I use Town Talk Original and also you can find it at any jewelry supplier or Amazon. This kind of cloth is perfect to clean tarnished Silver pieces and also for some pieces that have some oxidised finish. You can use it to clean the polished areas and keep the oxidised parts still black.

If you have a Silver mat ring I don’t recommend use this cloth because it can make the piece look more tarnished. So, if you have a mat Silver ring you can use the Hagerty Silver Clean as we saw but if you don’t want to invest in a chemical product you also can use Bicarbonate. It’s usual to have Bicarbonate at home, so you can use it with a toothbrush to clean your ring, and once you finish you can also use dishwasher soap and a cotton cloth to dry. If you use Bicarbonate in polished pieces you can scratch the polish and make the Silver ring look more mat.

If you have a Oxidised Silver ring, the best way to clean it is with the Polishing cloth or use dishwasher soap and a cotton cloth. If you use any abrasive cleaning product you can make the oxidised parts go out and make the ring look more polished.

How to Photograph Jewelry

When I started selling my jewelry online I realised that I need better photos for my pieces, because photography is the most important thing when you sell online. It’s the only way the customer can see your product and have an idea of how it looks like.

So I decided to invest in a good camera and great lens. My first camera 15 years ago was a Cannon G10, then I had a Cannon G16 and since 3 years ago I use a Cannon EOS 750D. Actually the two lenses I use more are my Macro EF-S 35mm, and my Ultrasonic EF 20mm, both with 1:2.8. I’m a big fan of Cannon but I’m sure there’re Nikon and other brands that have amazing machines. I’m also lucky to have a photographer for friend (Dario Rumbo @_dazzad_) that always helped me to choose the great combination of lens and camera.

On my jewelry I use a lot of gemstones, and since the beginning I realised that the best light to shoot gemstones was natural light. I tried several times to use artificial light and light boxes but I never got the photo results I got with natural light. If you are a professional with photography skills or have a great set up, maybe you can control the light and get amazing results. But, this was not my case, I’m jeweler and all I want to explain here is my experience as a no professional photographer.

I use natural light, with indirect light and a translucent white curtain depending on the pieces. The best hours to shoot are the morning and late afternoon, because the light colour is perfect and not so intense. The cloudy days are perfect to use natural light and also the best days to go outside for a photoshoot. The clouds mitigate the light and reflections and the jewels look great.

I’m not going to talk about the sizes and the format I use because it changes a lot depending on the photos. I usually shoot in big format and change it with the edition depending on what I need.

I use Photoshop for edition. I know that it’s maybe quite difficult for a beginner, I did some classes during my jewelry studies and then I learned by myself asking to some friends and looking tutorials. There are lots of photo edition tutorials on Youtube! I also use Lightroom CC app on my phone to edit photos. This app is very easy to use and it lets you edit your photos as good as Photoshop.

https://www.etsy.com/seller-handbook/article/case-study-how-to-photograph-jewelry/150875867017

Here is my experience and I hope this can help you to make better jewelry shoots. Some weeks ago I discovered and amazing article from Etsy talking exactly about how to photograph jewelry. Here is the link to this article and it maybe will give you some more information and some tips and tricks.

If you have any suggestions or questions don’t hesitate to leave them in comments. So everybody can collaborate to grow this article with more information about it.

Now it’s time to go to shoot!

Amethyst / Transcend to Transform

Transformation + Protection + Addiction-Release + Sleep aid

Treasured by generations of crystal lovers, Amethyst’s name comes from ancient Greek legend of Bacchus and his intoxicating powers. Taking legend to heart, Ancient Greeks and Romans drank from Amethyst goblets as a talisman against overindulgence and addiction. English regalia were even decorated with amethysts during the Middle Ages to symbolize royalty. Amethyst jewelry has been found and dated as early as 2000 BC.

It has been associated with many myths, legends, religions, and numerous cultures. Some historical accounts say that Saint Valentine had an Amethyst ring carved with an image of Cupid. And for those familiar with Old Testament history, Amethyst was one of the twelve gemstones that represented the twelve tribes of Israel.

For many years, Amethyst was held to be one of the most precious gemstones, often favourited by royalty or exclusively by the clergy as a symbol of Christ. It was even held for many years in the same regard as the diamond. It wasn’t until the discovery of more abundant supplies of Amethyst that it became a gemstone enjoyed by more than just the wealthiest buyers.

Leonard da Vinci once said that amethyst helps to quicken intelligence and get rid of evil thoughts. 

Today, Amethyst reminds us to always treat body and mind as a sacred temple. A stone of protection, it creates an ultraviolet bubble of protective light around people and spaces, and it’s very helpful for insomnia and nightmares. A stone of transcendence, Amethyst heightens psychic powers, and will strengthen your connection to all things mystical and magical. 

Amethyst is a purple variety of Quartz (SiO2) and owes its violet color to irradiation, iron impurities and the presence of trace elements, which result in complex crystal lattice substitutions. Its hardness (a 7 on the Mohs scale) is the same as other Quartz and the best varieties of Amethyst can be found in Siberia, Sri Lanka, Brazil and the far East.

Amethyst is the traditional birthstone for February and a zodiac birthstone for Aquarius and Pisces. 

Bibliography:

– Crystals, The Modern Guide to Crystal Healing, Yulia van Doren.

– American Gem Society, www.americangemsociety.org

– Wikipedia


……… CATALÀ ……..

Transformació + Protecció + Alliberament de l’addicció + Ajuda a dormir

Col.leccionada durant generacions pels amants dels cristalls, el nom d’Ametista prové de l’antiga llegenda grega de Bacus i dels seus poders embriagadors. Els grecs antics i els romans bebíen de calzes fets d’Ametista com a talismans contra la indulgència excessiva i l’addicció. La regalia anglesa va ser fins i tot decorada amb ametistes durant l’edat mitjana per simbolitzar la reialesa. S’han trobat joies d’Ametista datades ja des del 2000 aC.

Aquesta pedra ha estat associat a molts mites, llegendes, religions i nombroses cultures. Alguns relats històrics diuen que Sant Valentí tenia un anell Ametista tallat amb una imatge de Cupido. I per a aquells que coneixen la història de l’Antic Testament, l’Ametista era una de les dotze pedres precioses que representaven les dotze tribus d’Israel.

Durant molts anys, l’Ametista va ser considerada com una de les pedres més precioses, sovint afavorida per la reialesa o exclusivament pel clergat com a símbol de Crist. Fins i tot es va mantenir durant molts anys amb el mateix valor que el diamant. Però quan es van descobrir jaciments més abundants d’Ametista es va convertir en una pedra preciosa a l’abast de més persones, no només dels compradors més rics.

Leonardo da Vinci va dir una vegada que l’Ametista ajuda a accelerar la intel·ligència i a desfer-se dels pensaments malvats.

Actualment, l’Ametista ens recorda tractar sempre el cos i la ment com un temple sagrat. És una pedra de protecció, crea una bombolla ultraviolada de llum protectora al voltant de les persones i els espais, i és molt útil per l’insomni i els malsons. És una pedra transcendent, augmenta els poders psíquics i reforça la teva connexió amb totes les coses místiques i màgiques.

L’Ametista és la varietat violeta del Quars (SiO2) i deu el seu color a la irradiació, a les impureses de ferro i a la presència d’inclusions. La seva duresa (7 a l’escala de Mohs) és la mateixa que altres Quars i les millors varietats d’Ametista es poden trobar a Sibèria, Sri Lanka, Brasil i l’extrem Orient.

L’Ametista és la pedra dels nascuts al febrer i la pedra dels Aquari i Peixos.

Bibliografia:

– Crystals, The Modern Guide to Crystal Healing, Yulia van Doren.

– American Gem Society, www.americangemsociety.org

– Wikipedia

Pablo Cimadevila

Since time ago I follow the works of this Galician jeweler, I like his jewelry and his video-tutorials on Youtube. Some of you maybe will know him because of the Discovery Max program called “24 Kilates”, o because he has created jewelry for celebrities like Laura Escanes and Risto Mejide, o maybe because of his Olympic Games participation. Either way, it seems that everything that comes to his hands becomes a jewel, even a screw! Don’t miss his latest video and as it says on his tattoo “If you can dream it, you can do it”.


Fa temps que segueixo aquest joier de Galícia, m’agraden les seves joies i sobretot els video-tutorials que fa a Youtube. Alguns de vosaltres potser el coneixereu pel programa de “24 Kilates” del Discovery Max, altres per haver fet joies a famosos com la Laura Escanes i el Risto Mejide, o potser el coneixereu per la seva faceta d’esportista Olímpic. Sigui com sigui, sembla que tot el que arriba a les seves mans es converteix en joia, encara que sigui un cargol! No us perdeu el seu últim video, i tal com diu el seu tatuatge “If you can dream it, you can do it”.

New 18kt!

Hello everybody! I’m here again, after some years not posting on 18kt I’ve decided to redesign this site to keep sharing information and jewelry things with you.

The past years the way we communicate and share the information have changed a lot, and this is the new way 18kt will do it.

You will find a new menu with new sections like Tips & Tricks, Gemstones and Interviews. I hope you like it and we can collaborate to make this community bigger.

Thank you!


Hola a tothom! Torno a ser aquí! Després d’una anys sense publicar pràcticament res he decidit redissenyar aquest bloc i seguir compartint informació relacionada amb la joieria.

Els últims anys la manera que ens comuniquem i compartim la informació ha canviat molt, i aquesta serà la nova manera que ho faré a 18kt.

Hi trobareu un nou menú amb seccions noves com Tips & Tricks, Gemstones i Interviews. Espero que us agradi i que poguem col·laborar per fer crèixer aquesta comunitat junts.

Gràcies!